In the ever increasing heat of summers here in Australia, you may be considering having a pool at home. Pools aren’t just for the wealthy – using a shipping container or two you can put one together in your backyard for a lot less than it would cost to have one purpose built from scratch!
Once more, with shipping containers, you can be a lot more imaginative as to how you do it. Want to step off your first floor balcony into the water for a dip every morning? That’s not impossible! Want something for laps as part of your exercise routine? Weld a few together! Though we’ve yet to see a full 25/50 metre length swimming pool made out of shipping containers it is theoretically possible.
Anyway, let’s have a look at what people have already done using shipping containers as swimming pools and perhaps inspire you into building one. Then we’ll give you some tips and tricks as to how to go about designing and building one yourself.
Shipping Container Pool Designs
Above ground pool
.jpg)
This is an example of an ‘above ground pool’ that is self-supported and can be dropped into place – perhaps over your house by a crane into your backyard.
The container pool sits on a concrete pad and is filled up with water on site. As you can see this one has had some serious thought put into it so not only is it a place to get wet and cool off, it sits well in the overall design and feel of the backyard too.
As you can see, people have even cut windows into the pool so people can watch their friends/loved ones under the water. This is not a safety feature but it does look pretty cool!
Inground Pool

Another design for a shipping container swimming pool is one that is recessed into the ground, or an inground pool. Basically a hole has been dug for the pool and it has been dropped into the hole. You can effectively hide the shipping container in this way and instead of celebrating that it is from a shipping container, perhaps pretend to be a bit posher and that it is just a normal swimming pool!
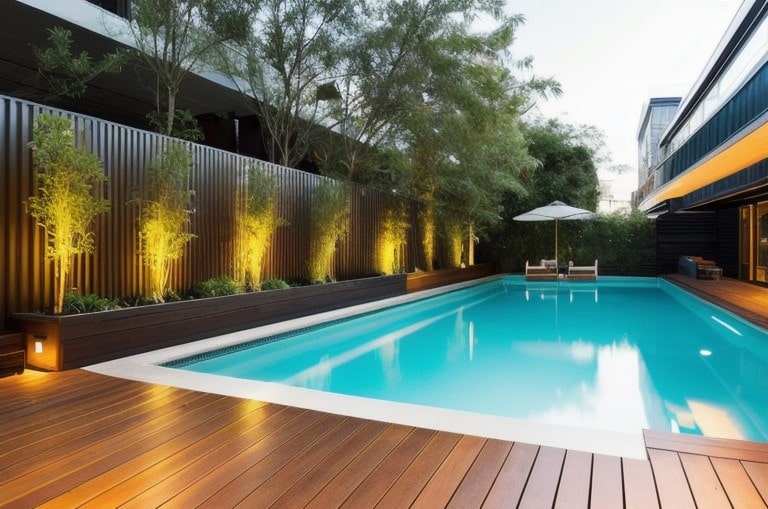
In the example above you can see how it has been worked into a general garden makeover and sits very nicely in the overall design. A few extra bucks in blending the container pool into the mini-landscape of the garden can make a lot of difference!
Tips and tricks for building your own shipping container pool
We have eight steps to consider before installing your own container pool at home. Let’s look at them now.
- What are the local planning regulations? You’d be appalled if your local council decided to make you get rid of the thing after spending several thousand dollars on it! That’s why it makes good sense to consult your local authority about its rules in this regard and then apply for planning permission as necessary to have one installed. Do remember that in drought areas the neighbours might not approve of you having several thousand litres of water just to splash about in when they aren’t even allowed to water their plants!
- How deep should the pool be? Kids will always migrate to your pool. That means that at the very least it should be shallow enough for a shorty to stand up in. That might be 1.5 metres depth at least in part, though you may want a deeper section for diving or just immersing an adult should you wish.

It’s fairly simple to adjust the depth – you just cut the bottom off and shorten the height from its 2.4 metre standard height. You will be needing someone to do some welding and perhaps cutting anyway to best to get it right from the start!
- Get an engineer in! Engineers can consider weight and stresses, as well as things like how to support the pool and even fitting the plumbing in such a way as to be unobtrusive and reasonably cheap to run as energy bills go. They will give you a detailed design for the pool with all the necessary considerations factored in, be it free-standing or recessed in the ground.
- Recessed or above ground? This impacts how you will prepare the ground. You’ll need a concrete pad capable of taking several tonnes of weight should it be above ground. You’ll also need some decking surrounding it (also supported) as well as some access – could that be from your first floor or from the garden on a slope like this one?

- How long/wide? Just cut the walls off and weld them together. Use your imagination! You can even shorten the thing to be a plunge pool.
- Lining and painting. Experts recommend that you weld a lining inside the pool to contain the water as it adds internal strength. Do remember that as standard, containers are lined with plywood – this needs ripping out anyway. For recessed pools, an engineer may put in a limestone lining around the pit the pool sits in so the rust doesn’t leach into the groundwater. In addition you should paint the internal sides as well. The top colour doesn’t have to be blue – again, use your imagination. It can even be bright orange as in the example above, but you could do a hot pink if that’s your style! Green? That may put people off as green water is associated with algae!
- Pumps and plumbing. Circulation and filling, as well as adding chemicals, are important so you maintain hygiene of the water. The last thing you want is friends getting stomach problems after a pool party!
- Decoration! How will it sit in your yard? You may even want to redesign the whole garden around it for an extra bit of zing to having your very own swimming pool. You’ll need to take into account Australian Pool Fencing Rules which determine what type of fencing counts as a barrier and how high it should be.
.png)
With these in mind, you can put your shipping container pool together for a decent price – a lot cheaper than someone having a company dig a hole and line it.
Finally, come to Gateway Container Sales for your containers!

You don’t need to break the bank to have a refreshing pool to cool off in during the summer. We can supply you with the shipping containers for your home pool project. Just give us a call today to discuss your needs!


